
Here I am checking the symmetry of the sides just behind the inlets. Made a template out of MDF then flipped it over to check the other side.

Close but just a little off. I made indicator blocks out of MDF ...

Then glued them in place to show me where to fill.

Started filling (I'm going to soon get sick of that word ... filling)

Some time has passed and I have the new profile on the underside of the belly (other post).
This is the first time I have offered the modified cowl up to the fuse. I have been relying on a template on an engine stand. The shape of the cowl bottom does not quite line up with the belly so some more adjusting is needed.

Experimenting with potters clay. This produced a remarkably good profile quickly but had the disadvantage of drying out. Later on I found I had to cut this out in strips and back fill with a polyester filler.

Resulting profile taking shape.

And the finished clay model. Note the plastic to keep it moist.


Resulting profile taking shape.

And the finished clay model. Note the plastic to keep it moist.

I've now finished with the belly mods and have flipped the KR back onto her wheels ... well the 2 mains anyway. I left the nose leg off so I could finish the cowl plug without it getting in the way. Trial fit the prop to check the ground clearance. I have 3.5" here but she is sitting in a nose down attitude. Hope to get 6 to 7" clearance when finished (even if it means trimming the tips again).
 Another view of the plug taking shape.

Strapped an RV-6 Ram air inlet to see how it looks. later I will fit this but will be tapering the training edge flush with the belly.

Some final shaping of the bottom of the cowl. Even with the 2.5" lower belly the oil tank on the O-200 protrudes a little. Eventually this will be covered by the ram air scoop but I still need a reasonably good shape to pull the mould off. You never know, somebody else may want a cowl out of the mould and choose not to add the Ram air.
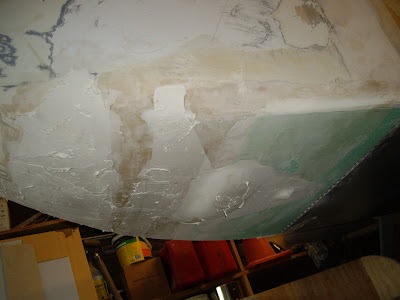 Sanding and filling and sanding and filling and sanding and filling and sanding and filling and sanding and filling. Gawd it makes an awful mess. See how the dust is picked up in the flash.

WOW! now I'm getting closer. Put a coat of fast dry primer on it so I can see all the flaws invisible when you have the mottled appearance of many layers of fill and old paint.

Certainly starting to look the business, still some minor fill jobs to make it perfect.

 Another view of the plug taking shape.
Strapped an RV-6 Ram air inlet to see how it looks. later I will fit this but will be tapering the training edge flush with the belly.

Some final shaping of the bottom of the cowl. Even with the 2.5" lower belly the oil tank on the O-200 protrudes a little. Eventually this will be covered by the ram air scoop but I still need a reasonably good shape to pull the mould off. You never know, somebody else may want a cowl out of the mould and choose not to add the Ram air.
 Sanding and filling and sanding and filling and sanding and filling and sanding and filling and sanding and filling. Gawd it makes an awful mess. See how the dust is picked up in the flash.
WOW! now I'm getting closer. Put a coat of fast dry primer on it so I can see all the flaws invisible when you have the mottled appearance of many layers of fill and old paint.

Certainly starting to look the business, still some minor fill jobs to make it perfect.

And just to remind you why I am doing all of this, here is what I started with.


No comments:
Post a Comment